How to switch between different brands
Throughout the video editing experience/cooperation, our users have used the branding feature a lot. Branding includes unique fonts, custom fields, a personalized set of the most frequently used colors, etc. Here you can read about adding your special brand settings to your Wave.video project editing space. Still, the main topic of this guide is navigation to switching between different brands in Wave.video streaming studio.
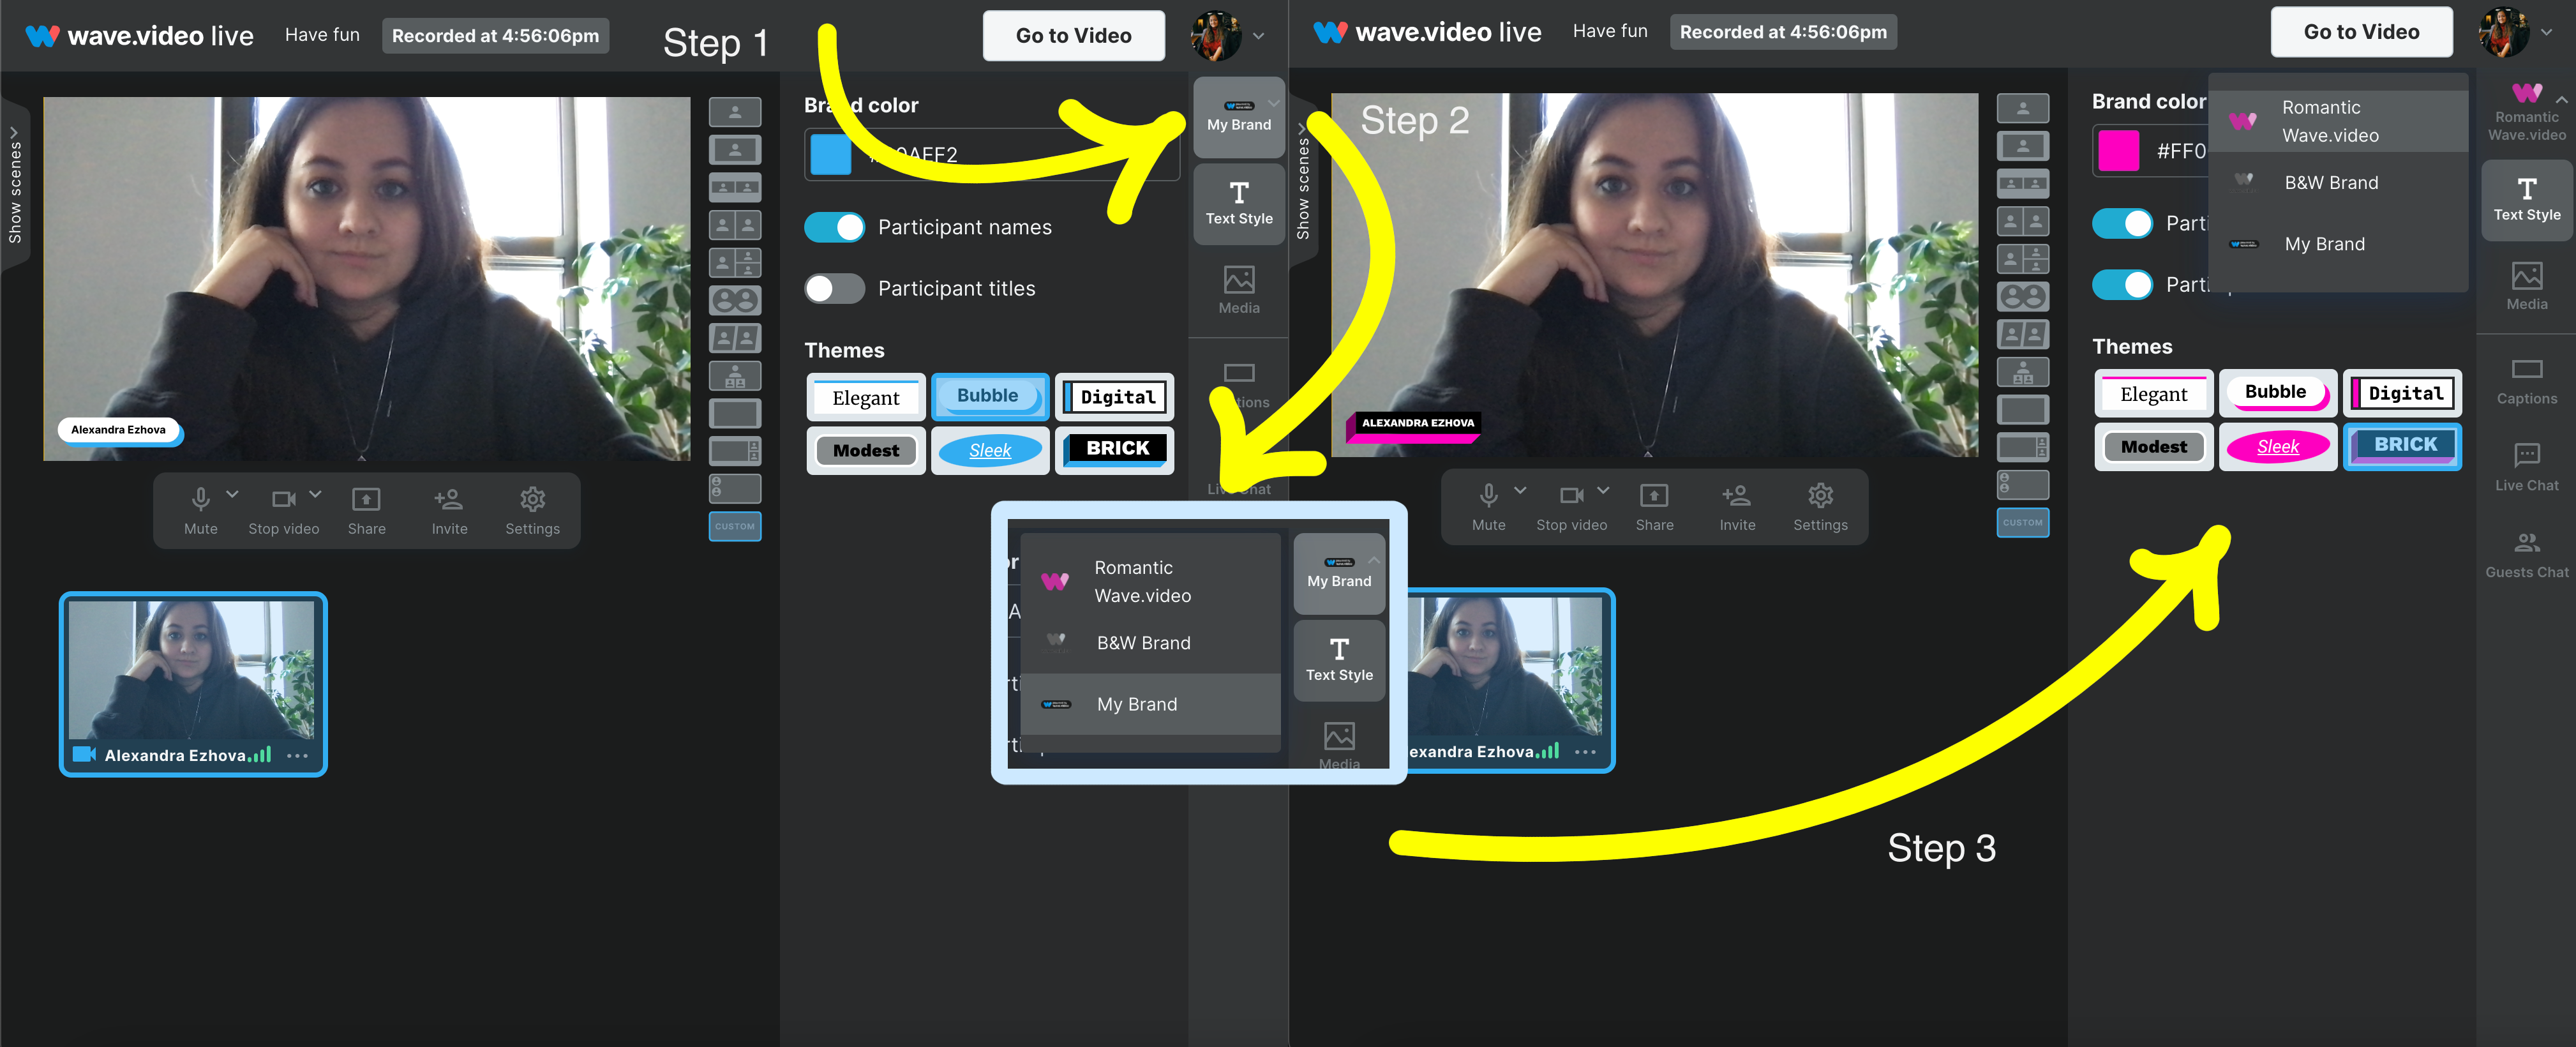
As you can see in the picture above, it would take you only three simple steps to switch between brands.
Step #1 – Go to the My brand button. It is in the top right corner, below your avatar. Click on it.
Step #2 – Choose the brand you want to apply to your stream in the pop-up menu.
Step #3 – All the brand settings are applied to your text, caption, and visual styles.
As you see, the navigation through Wave.video live streaming studio is as easy as one, two, three.
Note: Depending on your subscription plan, various brand settings are available to you. Unfortunately, brand settings aren't available if you are on the Free plan. For Creators, there is only one brand available. If you have a Business plan, you can create up to 50 brands under your account.

